

Porting Kristof Dedene’s Anime/Ghibli inspired Water Shader in Unity 3D
Over the past decade in the game industry, I've had the privilege of growing from a Hard Surface Artist to a Senior Technical Artist, contributing to renowned titles like "Spider-Man: Miles Morales" and "The Callisto Protocol." My journey has allowed me to develop expertise in 3D pipelines, shader creation, and complex graphical systems across Unity, Unreal, and proprietary engines. I've worked hard to build strong skills in Python, C#, C++, HLSL, and GLSL, which have been crucial in my role. I find great satisfaction in connecting art and technology, whether that's through crafting detailed models, building efficient tools, or fine-tuning rendering pipelines. What drives me is the constant challenge of advancing game graphics, where I can apply both creative vision and technical knowledge to elevate visual quality and optimize development processes. I'm always eager to learn and push myself further!
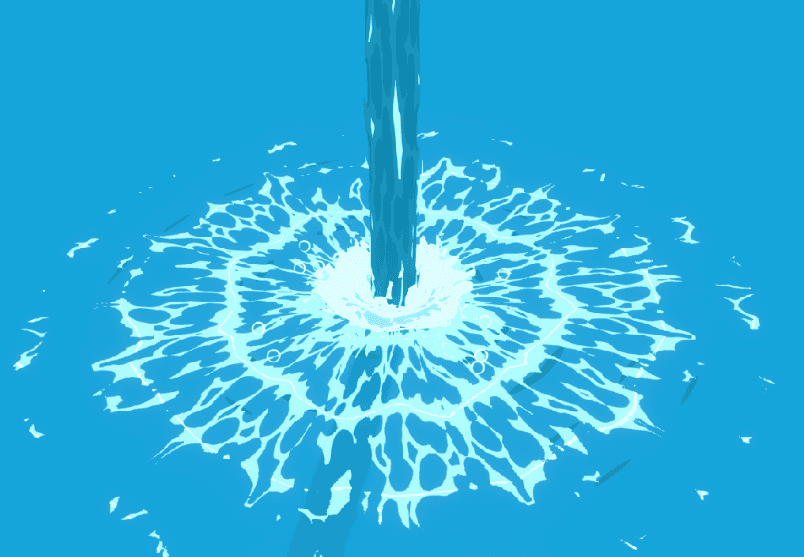
Today I saw Kristof Dedene’s tutorial titled “Tutorial: Advanced anime water splash FX in blender” and I thought it would be cool to try and attempt to make it for real-time use in Unity using URP and Shadergraph, instead of Blender.
So, where do we begin? Well if you haven’t seen his tutorial first, I would highly recommend watching it first, then coming back here and seeing how you could port it.
Firstly I noticed that there are a lot of nodes he uses that are straight-up incompatible with real-time applications so this is not a 1:1 copy of his nodes, which would be impossible, and inefficient for real-time.
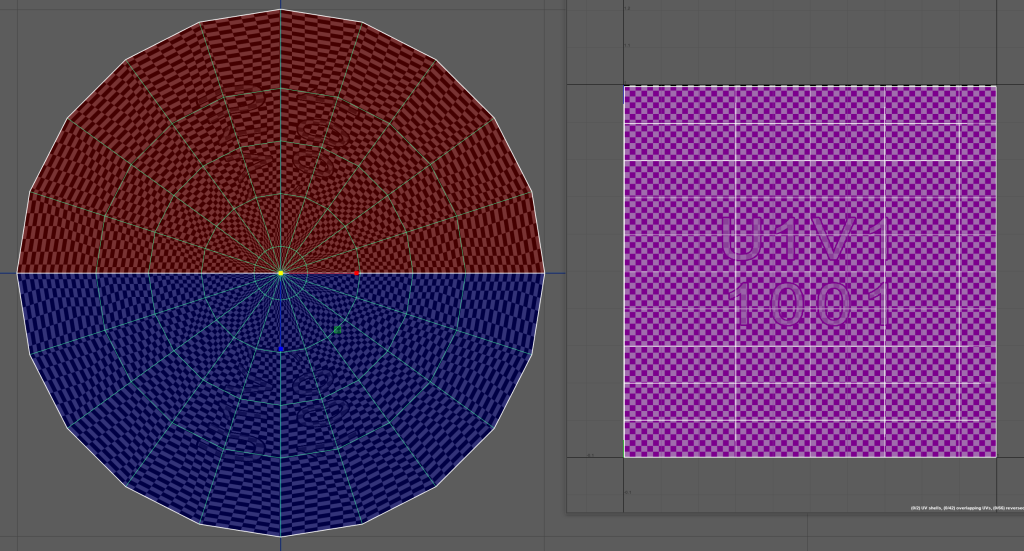
His water is composed of 3 elements. A deceiving disk that is UV’d straight (I’ll get to that later), a cylinder that is used as the spout of water, and the splash mesh that is shaped like a cone.

I’ll go into a bit more detail than he did on how to create these meshes because he is using a bunch of modifiers that might not work the same way in other applications. With that being said, the tricky mesh we have here is the ripple disk. You can create this the same way he did if you have Blender, and if you have Maya you can use the bend modifier much the same way, but when it comes to the UV’s you will need to UV it straight like you would a pipe and normalize it so it takes up the entire UDIM. It is also mirrored (although this isn’t necessary, you just get a bit more resolution, at the cost of a slightly noticeable seam line).
Give each of these bad boys their unique material and it might be a good idea to export all the meshes as separate files so you can customize them easier later.
Okay so now we have the problem of what the heck we need to do in Unity. Here are some of the compatibility issues with how the system in Unity works.
Problem A:
Voronoi texture node in Blender “kind of” exists in Unity as well

The biggest difference is how he gets the result when it duplicates the Voronoi and uses smooth f1 and subtracts it from the previous Voronoi texture. The issue with doing the same in Unity is A, there is no “smooth Voronoi” in Unity. You could use Smooth step, but we are adding a bunch of useless nodes now and it’s going to get expensive fast. He also uses "Clouds Noise" and multiple other instances of Voronoi.
Problem B:
The ripples can just be gradient pillars in Unity, but generated in the way that he did in Blender, since the UV’s are layed out where a flat gradient will be a radial gradient in 3D space.
The way he generates the ripples in Blender is not going to be the same in Unity at all, but there is an option to generate something similar in Shader Graph mathematically with something like this.


But the issue here is we want to save computation because it’s real-time, so there seems to be one solution that lets us get there, and it is to generate the textures before and pack them into an RGBA texture.

Solution for A and B:
Substance Designer (or equivalent) will suffice for pre-generating these tileable textures and we can fit everything we need into one 1024 x 1024 texture.
This is how I have my substance designer file setup for this step.

For the R channel we have the result of the 2 Voronoi subtracting which looks like this.

For the G channel I put in the pre tiled pillars that we will be panning to create the ripple effect. I’m just running a Gradient Linear node into a tile generator.

For the B texture I just have a Gaussian Noise.

For the A channel I have the original cells 1 texture (Voronoi equivalent).

Okay now let’s go to Unity.
The Ripple Shader:
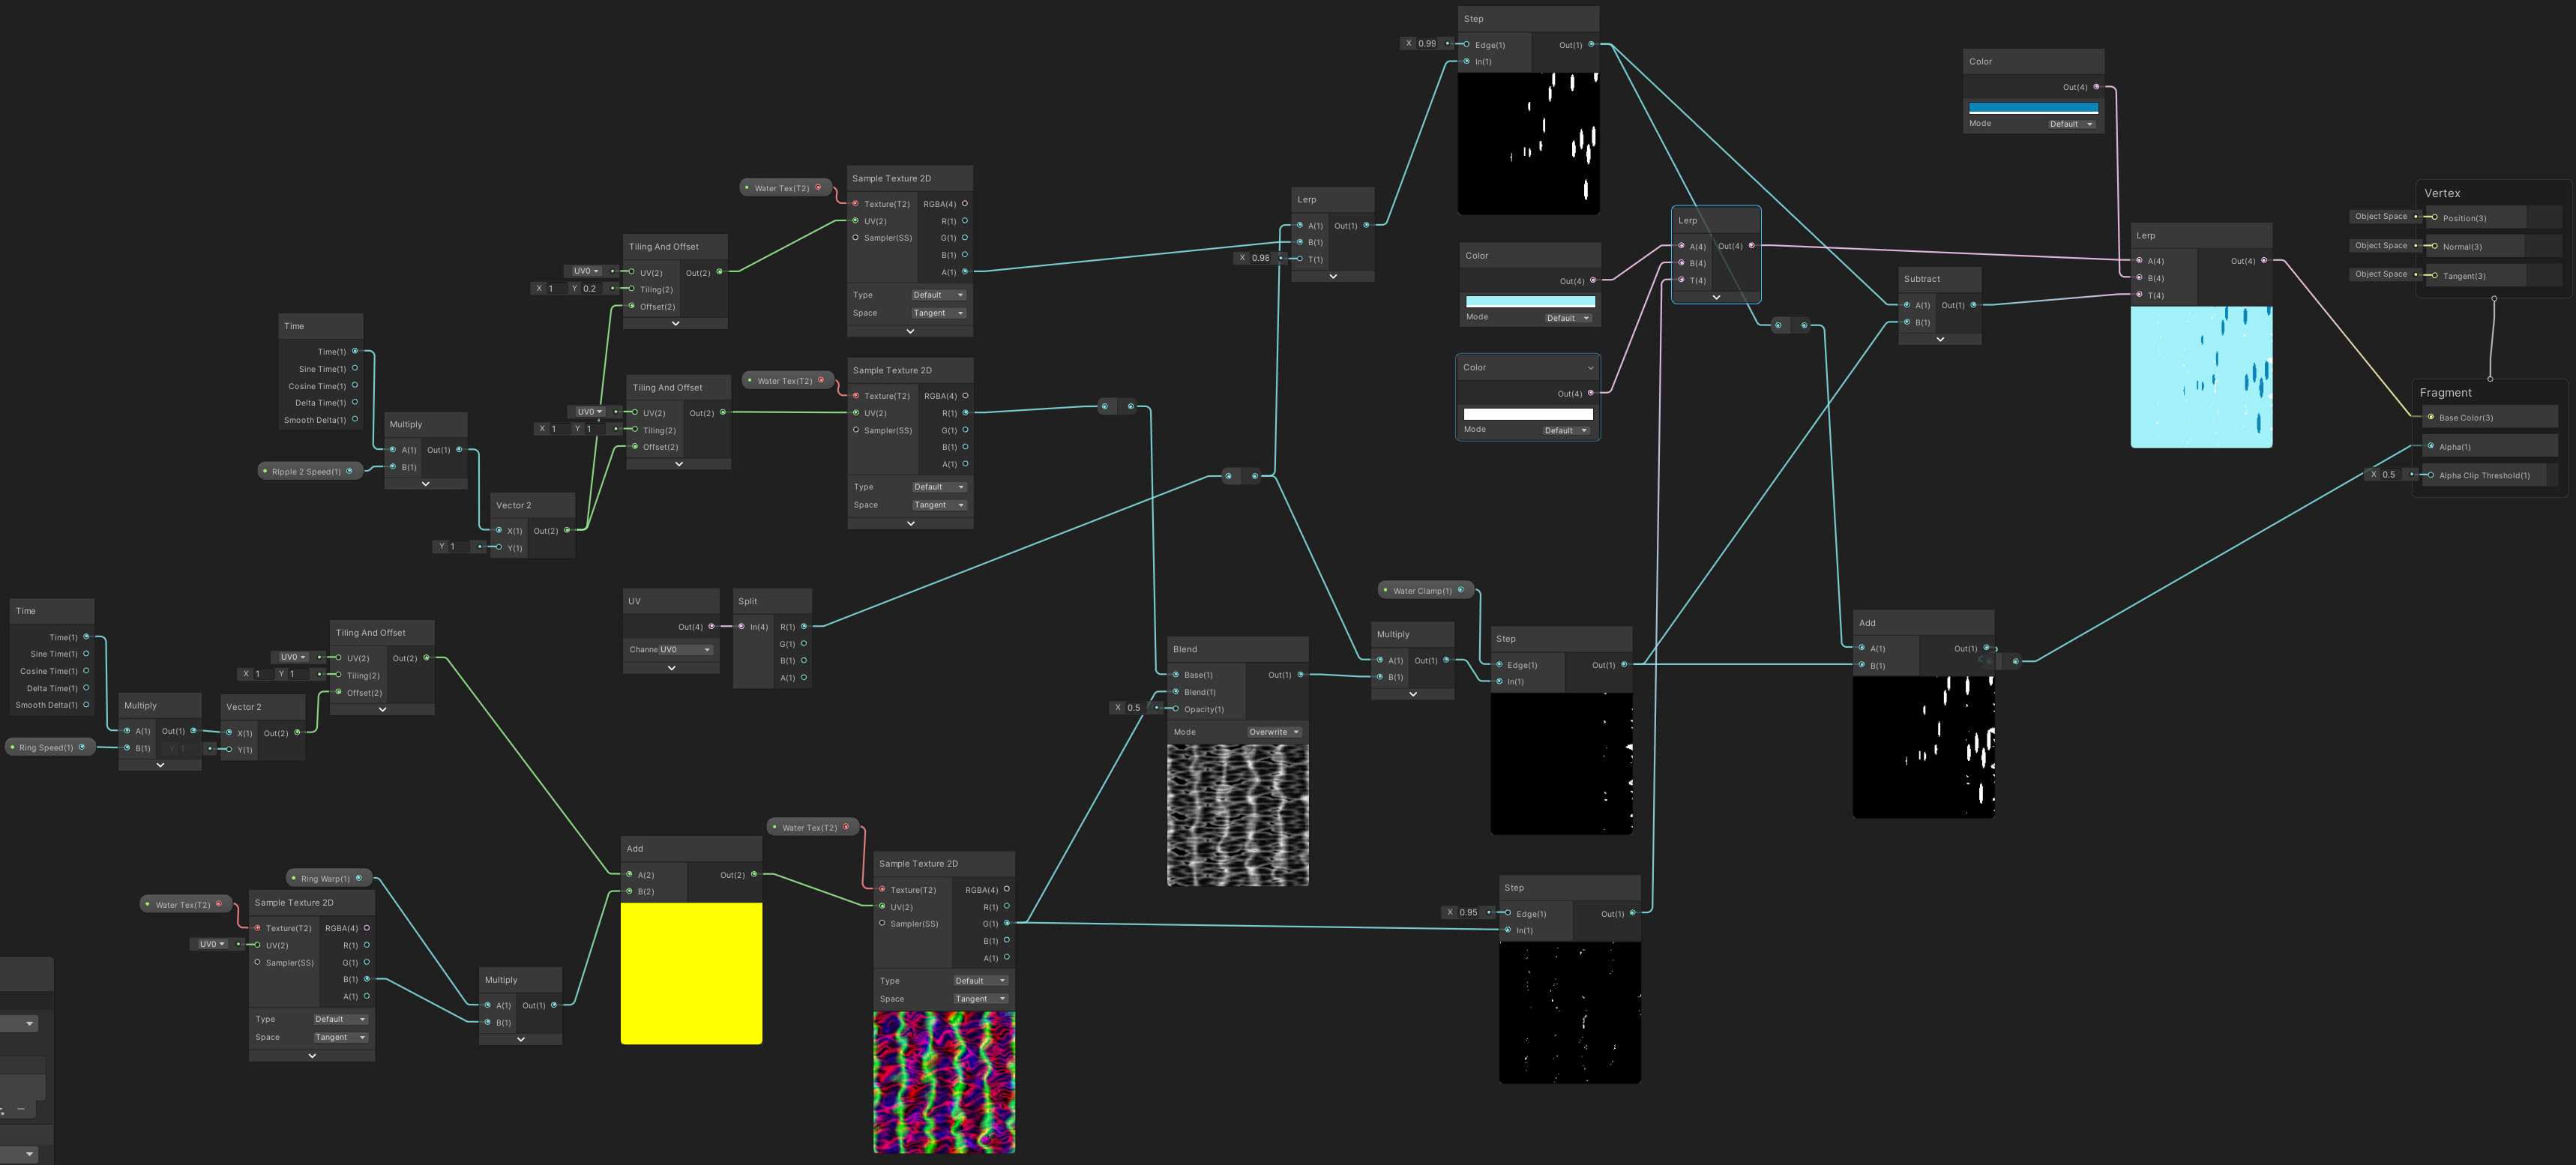
Everything is sort of the same except I combined the darker ripples, and am just sampling the texture 3 times due to different speeds that it needs to be offset by, but it’s still cheaper than using the Voronoi node multiple times in Shader Graph.
Some notable areas include Step instead of using the Gradient Sampler in shader graph. Step is way cheaper than the gradient sampler. Using Blend instead of Mix when combining, and using Lerp instead of Blend to blend based from an alpha.
The graph should be pretty self-explanatory for the average shader graph user, but I will be providing the source files that you can take apart and play around 🙂
The Splash Shader:

I want to emphasize that I’m using the voronoi in the A channel to basically replace any time he uses a voronoi node.
The height displacement part can be plugged in here as well.

The Spout Shader:


Anyway, to wrap up here's the Unity files you can play around with. Have fun!
